The Orb Power Flower is a configuration of the Power Flower principle that is suited for smaller scale, "working" environments (e.g. your lab) where easy access to a Power Flower is needed without the need for EMC generation of the scale of a Petaled Power Flower .
It favors easy access, ease of production (condenser target) change and lower space requirements over the amount of EMC produced. It is often the most common starter power flower configuration as it is cheaper and easier to use than the more advanced Petaled Power Flower.
It requires 1 main condenser, 5 relays and 17 collectors.
The central condensor can also be replaced with another collector and used to power a Klein star instead of creating items. This actually generates slightly more EMC/sec than with a condenser.

Basic Orb Power Flower configuration
Required Materials[]
The following is a list of materials used in the construction of the Orb Power Flower. Please note that some of these materials and machines can be replaced with upgraded versions of themselves (e.g. MK II and MK III instead of MK I).
17x Energy Collectors (upgrade to MK2 or MK3)
5 x Antimatter Relays (upgrade to MK2 or MK3)
1 x Energy Condenser (or an extra Collector)
The energy required to build this arrangement is as follows:
| Type | Central Condenser | Central Collector |
|---|---|---|
| Mk I | 1,823,097 EMC | 1,864,039 EMC |
| Mk II | 5,071,929 EMC | 5,262,887 EMC |
| Mk III | 15,529,721 EMC | 16,198,375 EMC |
Step 1: Planning Space Requirements[]
A standard 'Orb' is about 7x7 on the X and Y axis (down and sideways for non-mathsy people) it will take up five on the Z axis (directly away from you). While this may seem large compared to your other machine set ups, remember this will stand alone and does not need interaction or connection to any of your other devices.
The sizes stated do not include glowstone, if you require a light source just add one onto every axis or, more optimally, every Collector surface (top face).
Step 2: Layer 1[]
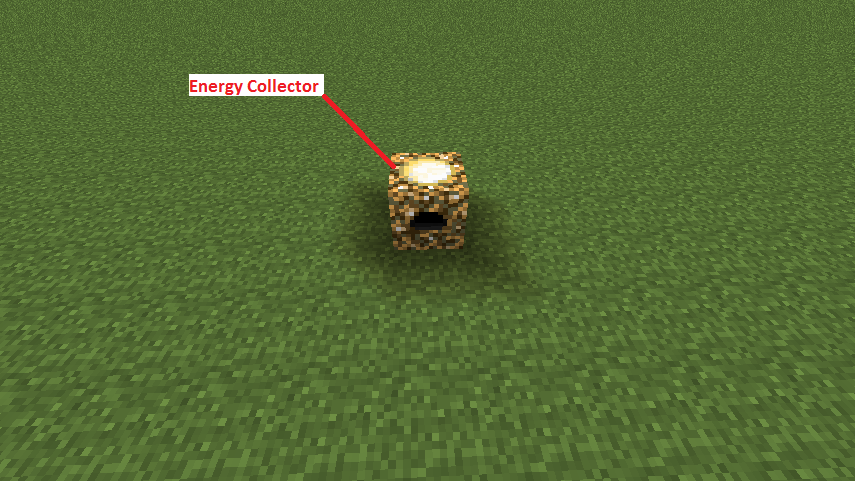
This is probably the easiest layer, it consists of a single collector. You just need to place a collector down in the middle of your square; right at the lowest point.
We will call this center-point "X" so "column X" is the one block wide stack above this collector. This is important.
Bottom Layer (forming base of "Column X" in tutorial) of Orb Power Flower
Step 3: Layer 2[]
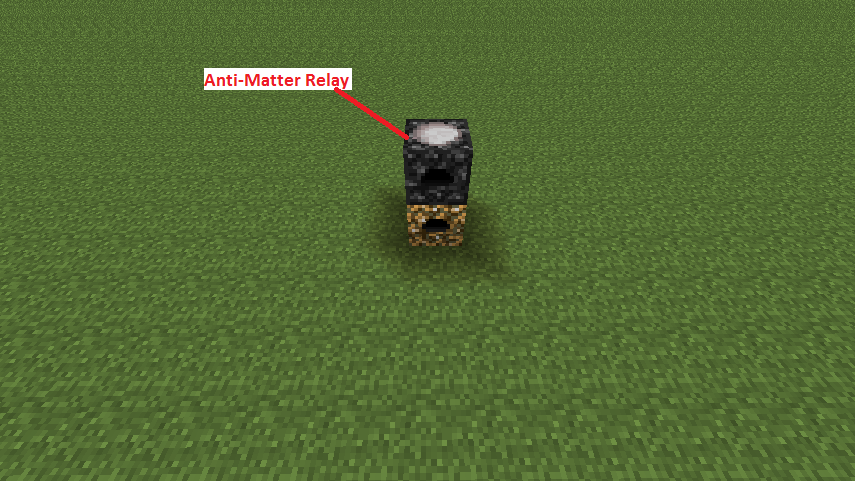
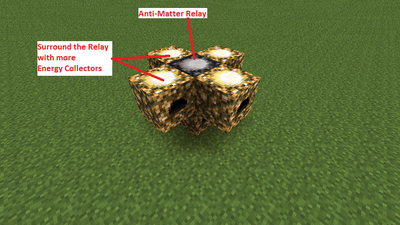
Atop your collector at the bottom of Column X place an Anti-Matter Relay. Then on every side (Except above it!) put another collector. You should now have something that looks like a little platform with a Collector and a Relay in Column X, and one Collector on each side of the Relay in Column X; so to the north, south, east and west.
Relay on top of Collector in Layer 2 of Orb Power Flower

Relay surrounded by Energy Collectors in Layer 2 of Orb Power Flower
Step 4: Layer 3[]
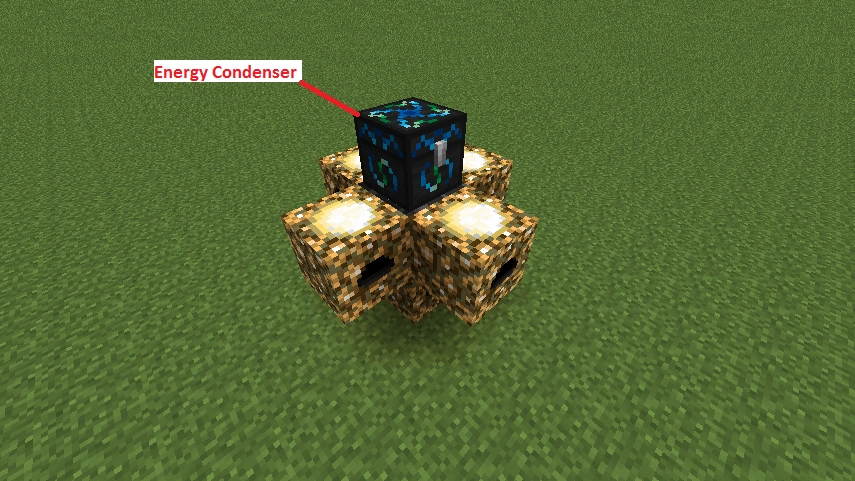
Atop your Relay, put the Condenser, this will be your 'interface' so make sure it is at eye-level when standing at on the floor of whatever room you've placed the Orb in. This should also be in Column X.

Energy Condenser sitting atop Energy Collector surrounded Anti-Matter Relay
Step 5: Relaying the EMC[]
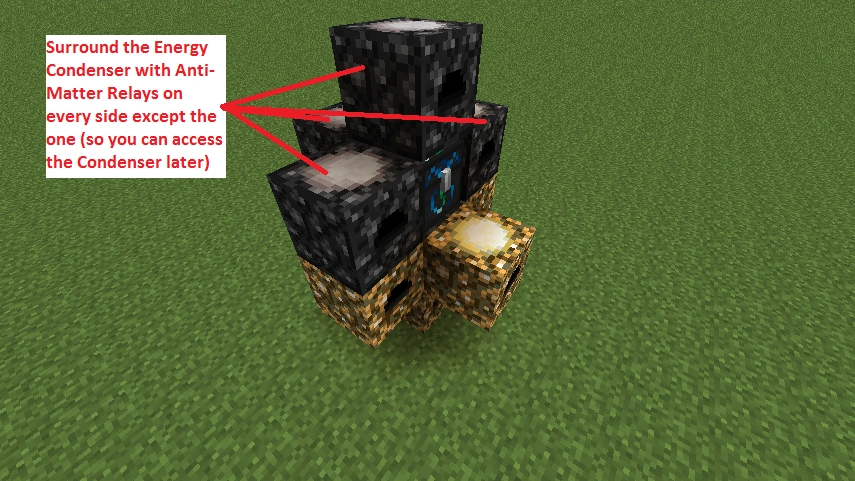
In Column X you should have a Collector, a Relay and a Condenser, in that order, from bottom to top. Now surround the Condenser on every side but one with Relays. The open side (without a relay) is how you will access your Condenser so DO NOT PUT ANYTHING IN THE WAY!

Energy Collector being surrounded by Anti-Matter Relays in Orb Power Flower
Step 6: Collectors []
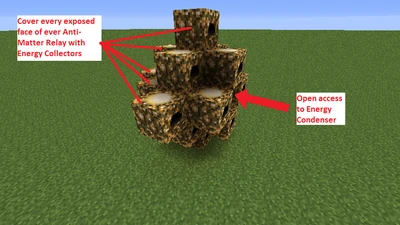
Around each of the Relay's put a Collector (on each side), you should now have a semi- 'Orb' shape with one side open to access the Condenser, If you have done it correctly the Relay's will not be visible.

All Anti-Matter Relays now completely surrounded by Energy Collectors except where they touch the Energy Condenser
Step 7: Usage[]
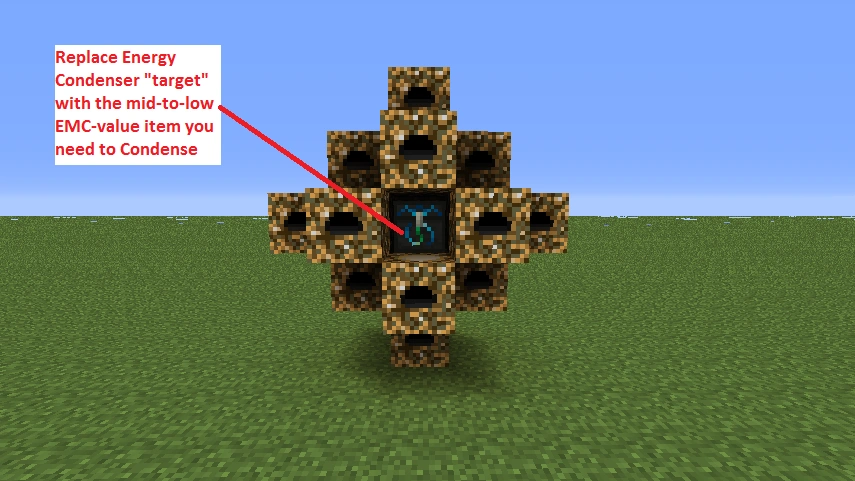
This Condenser set up is not used to provide large amounts of EMC as it is more used as a 'working' condenser. If you are part-way through a build and don't have quite enough of a specific resource, this is the 'go-to' Power Flower. The ease of access and the ability to repeatedly change the target from one item to another (e.g. Iron to Copper) is the trade-off from a larger, higher-EMC-yield Power Flower configurations.

Energy Condenser now surrounded in EMC production. Replace "target" to condense different items.
Step 8: Glowstone Optimization[]
If you aren't using MK3 Collectors you should go back and cap off all the tops of visible Collectors with a block of Glowstone. This will also let you bury the power flower underground.


All exposed tops of Energy Collectors covered with Glowstone Blocks to maximize Energy Collection